Monday, December 5, 2011

Well I am slowly gathering bits and pieces for the build I have now got a set of strut reinforcment plates and a new alloy centre consul I will pick them up hopefully tonight so I will post photos soon.On the progress front not much more achieved as work is very busy at this time of year and I am working most weekends and getting into a suit after grinding and welding is not a lot of fun ( i would much rather stay in my overalls but need the overtime to pay for the bits and pieces i need). I do not think I will achieve much before Christmas so will take this opportunity to wish everybody a great xmas and a safe new year.
Peter 

Wednesday, November 23, 2011

Well I am another year older and I still don't have an escort on the road. I have made a bit more progress on the L/H guard I have painted the guard and fitted the L/H bubble arch. Once I had cut the excess steel away and test fitted the arches I removed them I put a adhesive on the inner side of the guard and screwed the arch in place temporarily. Once all the screws were in place I drilled and riveted the arches in place. I have used countersunk 4mmx10mm poprivets with washers on the side of the inner arch to prevent the rivet pulling through the fibreglass. Once the adhesive has dried I will trim off any excess and then give both the guard and the arch a light sand before putting the filler in place and finishing it off with a fibreglass layer for strength.
The arch screwed in place


This is the adhesive I am using
And all riveted in place


The front profile of the finished arch
Peter

Friday, November 11, 2011

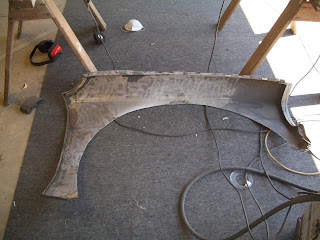
I spent most of yesterday striping down and cleaning up the L/H guard. This involved removing all paint and bog, getting access to any dents and rust ( there is a couple of dents that were filled with bog and a small area of surface rust at the bottom of the rear side of the arch this involved removing the filler panel to get good access) once the guard was cleaned up I can now work on getting the rail tidied up and ready to fit the bubble arch. I wont fit the bubble till all the repairs are completed as I do not want to risk damaging these.
most of the paint removed

I also cleaned up the inner side as there is a small amount of surface rust under the paint this area will be painted with hammerite primer.

This is the area of rust at the rear of the arch not too bad in my opinion
Peter

Monday, November 7, 2011

I have marked and cut out the front guards to fit the bubble arches. I have also started to repair the drip rails as these ot a wee bit damaged on removal (drill holes and a couple of patches where I had to use a chisel to get the guards off). All I need to do now is clean the guards and inner panels then bond, rivet, bog then I will fibreglass over the panel to stop the bog cracking. I need to repair the rust on the inner panels and weld up and grind smooth the drip rails then sort out were the fittings are to go so that I can get the guards to bolt on.
Now that the guards are off I did some investigation today and found some more rust. It was under some silicon filler once that was removed it reveales a bit of tin worm on top of the R/H A pillar after a bi of grinding that revealed most of it I found that it is a not too difficult repair I should finish this tomorrow with luck once this is done I can start on the drill holes in the drip rail and then work on the left side. I also had a chance to water blast the inner guards and front guards to remove  any dirt I will then sand down the panels and preprime these before I fit the arches.

The R/H guard cut and sitting in place

The L/H guard

The area of rust found The Weld is on of the worst that I have done so will grind off and redo it

Also found this small patch

This is a shot of some repairs I found on the R/H guard near the head light A lot of this was cut out when I cut the guard.
Peter   

Friday, October 28, 2011

I have removed both front guards of black car today. I saw some small bits of rust on the inner guards and decided to take both guards off to make access easy It will also make it easier to fit the new bubble arches I know that I wanted to fit steel bubble arches but cost has stopped that idea so I purchased a set of new glass ones. The guards were difficult to remove as they are replacement and had been welded on well. Once I have tidied up the inners the new guards will be able to be bolted on to make repairs easy. The rust that I had seen was in the section where the inner and outer guards fit together and is about what I was expecting a patch of about 60mm square so it is an easy fix. Compared to what I have done on the other car anything is going to be easier. On the other side all is ok except for a very small rust hole where the inner guard meets the bulk head.
The first guard off

in the upper centre of this photo you can see the small rust hole

the other guard off

The patch that will need to be replaced

and a small hole in the LH A pillar
After what I found on the old car this thing is mint

Saturday, September 17, 2011

This weekend has seen a bit of progress on the black car. I have started to remove the SR20 engine mounts. These were quite substantially welded in The main plate welded to the inner guard will remain as this will be difficult to remove with out damaging the guard, the other sections can be ground off these are welded to the chassis rails so I will need to be cautious that the rails don't get damaged. I also started to remove paint from the boot floor there is a bit of rust in this but most of it is surface so I will probably just clean it off and rust prime it onc the rust holes are done. I have also found some rust around the rear quater windows and again this is just surface so will clean up okay. She also got her first bath in who knows ow many years so a lot of the dust is now gone, 

This shows the slam panel removed Fortunatley The white cars one is okay to reuse

In this you can see the remains of the SR20 mounts

This is a good shot of the altered fire wall and bulk head


The boot floor prior to cleaning


And after I had stripped off some of the paint

The suface rust in the R/H quater window
  

Saturday, September 10, 2011

Well after a long long week at work I got home on Saturday morning and decided to do a bit on the black car. During waiting time at work I decided to get the black car on its wheels for 2 reasons 1 to make it a bit more mobile around the garage till I make up new spits (rotisserie) for both cars. I returned the spit that I had for the original car as it does not quite work on the new shell. And 2 I want to get this car road legal and due to our Laws any structural changes and assocaited welding must be done by a certified welder.so I am wanting to fit rear turrets and other changes all of which require a certified welding so it makes it easier to transport the to and from the Panelbeaters. By Sunday The car was on its wheels so I can now start to source the bits and pieces required to be fitted, Turret boxes, chassis gusset rear tubs, bubble arches and other bits and pieces. So I have some progress at long last. I will add photos at a later stage.

Sunday, August 7, 2011

Absolutley nothing done on the cars this weekend. Instead I had a massive sort out Almost all of the bits and pieces I scored with the new project are now safely tucked away under the house ready to be used as required. I now have 3 sets of doors, windscreens, rear windows, 4 english axles, 1 atlas axle, 1 1300 motor, 1 2 piece drive shaft, 1 type 9 driveshaft yoke, and a whole lot of other bits and pieces so I am gathering a fair amount of stock. On the bonus side I also have nearly got my trailer back as I have been using that to store all this stuff for the last couple of weeks. This coming weekend is not looking promising for any progress as we have decided to get the single seater out for a run in the winter series at Hampton Downs. The owner has rebuilt a couple of heads for the motor as the old ones were not allowing the engine to rev freely. The boxer engine that we are running would normally rev to the limiter easily but the old one was hardly getting to the limiter when going down hill so hopefully we have sorted out a major problem. This weekend will tell the racing is only on Sunday so I might get a little bit done on Saturday but this is unlikely as My wife will no doubt have a few things to get done as she is wanting to come down to the track as well. 
Keep safe 
Peter 

Monday, August 1, 2011

This weekend I removed the doors and started to clean up the floor in the drivers foot well. Surprises found The doors have been fitted with central locking,
She has a cable boot release,
There are just a couple of small rust holes in the floor
So far so good. I also made it down to Hampton Downs race track on Sunday afternoon for a marshal ride day for a couple of hours some of the regulars who racethere took the Flaggies and other volunteers out for some hot laps and the guy I crew for on the single seater dusted off his Alfa Sud and took some out for a blast it was a great afternoon and a fantastic way to thank these guys and girls who with out them we would not get to enjoy time on the track. So from me to all who offer their services worldwide free of charge THANKS we really do appreciate what you do and judging from all the smiles up and down pit road this was a great way to say thanks
Peter  

Friday, July 22, 2011

Ok here are the photos of the new project. She is now in the garage sitting on axle stands ready for me to start stripping her down. Once she is empty I will get her back on to the rotisserie and off to get soda blasted and primed.
The under side all cleaned up

A small amount of rust in the boot floor

In the tank panel with patches ready to be finished off


Showing the large tunnel


And the mounts for the SR20 engine


The inside


The main dent in the car is this on the front panel

How I have managed to fit the extra car in the garage


Sunday, July 17, 2011

I have Purchased a new project shell a very good price 1200 NZD (you do the math). This does not mean that the old girl is junk I have spent too much time on her to just stop I will continue with her but at a later stage. I am currently thinking that the old girl will be for racing only not really for the road. As such the new shell will be a shorter build as she has virtually no rust. I will get her soda blasted and primed then possibly fit a set of steel bubble arches a atlas rear end 2 linked and will fit the 2 litre and 5speed that I purchased a couple of months ago. the shell has a large tunnel and mounts for a nissan SR20 engine and box but I am going to stick with the Pinto as I want to stay with a more mechanical engine and not computer controlled.
I will take photos of the new car next weekend as she is now under a tarp outside till I move the old shell to the side of the garage which I will do this week.
cheers Peter 

Sunday, July 10, 2011

Only a small amount achieved this weekend mainly a bit of filling and giving the area a coat of primer to protect it from any moisture in the air as we are having our mid winter storms at the moment. So lots of rain around. The reason for not doing much is that my wife had a major birthday so it was a party weekend with lots of visitors. Have a good week Peter

Saturday, July 2, 2011

Today I removed the old frame that was used to hold the battery in the boot and what do you know underneath was my old friend rust bugger.Once I removed the frame and ground away the excess steel and rust I cut a patch to fit and after a fare amount of welding and grinding it was fixed. I also tacked the new Patch into the L/H corner this involved a bit more work than the R/H side as the panel was not as badly damaged so it has been butt welded together on the R/H side I over lapped the panels once finished this side will look quite good .

The panel that was under the battery frame


These 2 are the new panel tacked in place I will finish the welding this comong week

Tuesday, June 28, 2011

Today I removed the front panel and top slam panel What a mess! It looks like I will need to replace the L/H inner guard, the R/H total strut top from front to fire wall, the slam panel the lower radiator support and of course the front panel. the side radiator supports are ok so I may reuse them I will not know this until I decide what radiator to use and what I will need to do to fit it.so I have a lot of work ahead of me. One thing I have purchased locally are a pair of Lucas L792 indicator/park lights these were used on the Borham Works escorts. these will enable me to use more modern headlights that do not have the parklights in the headlights ( one of the things that I hated in the old escort) as the bulbs were always blowing.
                                     
                                                              the front panel removed


the lower radiator support

The front L/H corner

The R/H lower corner

The rust you can see in this one is the front of L/H inner guard it has had patches welded over the rust but as I have found in other places the rust has not been removed so this is why I am replacing the entire inner panel.