Wednesday, November 23, 2011

Well I am another year older and I still don't have an escort on the road. I have made a bit more progress on the L/H guard I have painted the guard and fitted the L/H bubble arch. Once I had cut the excess steel away and test fitted the arches I removed them I put a adhesive on the inner side of the guard and screwed the arch in place temporarily. Once all the screws were in place I drilled and riveted the arches in place. I have used countersunk 4mmx10mm poprivets with washers on the side of the inner arch to prevent the rivet pulling through the fibreglass. Once the adhesive has dried I will trim off any excess and then give both the guard and the arch a light sand before putting the filler in place and finishing it off with a fibreglass layer for strength.
The arch screwed in place


This is the adhesive I am using
And all riveted in place


The front profile of the finished arch
Peter

Friday, November 11, 2011

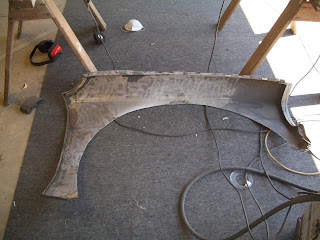
I spent most of yesterday striping down and cleaning up the L/H guard. This involved removing all paint and bog, getting access to any dents and rust ( there is a couple of dents that were filled with bog and a small area of surface rust at the bottom of the rear side of the arch this involved removing the filler panel to get good access) once the guard was cleaned up I can now work on getting the rail tidied up and ready to fit the bubble arch. I wont fit the bubble till all the repairs are completed as I do not want to risk damaging these.
most of the paint removed

I also cleaned up the inner side as there is a small amount of surface rust under the paint this area will be painted with hammerite primer.

This is the area of rust at the rear of the arch not too bad in my opinion
Peter

Monday, November 7, 2011

I have marked and cut out the front guards to fit the bubble arches. I have also started to repair the drip rails as these ot a wee bit damaged on removal (drill holes and a couple of patches where I had to use a chisel to get the guards off). All I need to do now is clean the guards and inner panels then bond, rivet, bog then I will fibreglass over the panel to stop the bog cracking. I need to repair the rust on the inner panels and weld up and grind smooth the drip rails then sort out were the fittings are to go so that I can get the guards to bolt on.
Now that the guards are off I did some investigation today and found some more rust. It was under some silicon filler once that was removed it reveales a bit of tin worm on top of the R/H A pillar after a bi of grinding that revealed most of it I found that it is a not too difficult repair I should finish this tomorrow with luck once this is done I can start on the drill holes in the drip rail and then work on the left side. I also had a chance to water blast the inner guards and front guards to remove  any dirt I will then sand down the panels and preprime these before I fit the arches.

The R/H guard cut and sitting in place

The L/H guard

The area of rust found The Weld is on of the worst that I have done so will grind off and redo it

Also found this small patch

This is a shot of some repairs I found on the R/H guard near the head light A lot of this was cut out when I cut the guard.
Peter